Magnetic particle inspection
Magnetic particle inspection (fluxes)

For crack tests on ferromagnetic steel parts in the aerospace or automotive industry, the crack indicators can be reinforced by flux testing (magnetic particle testing, for example according to DIN EN 10228-1).

The test piece is magnetized and then fluorescent magnetic powder (dry flux) or a suspension (wet flux) is applied. Under the magnetic field, the magnetic particles nest on cracks and are held there. Under UV lighting, the particles fluoresce and show sharp-edged cracks. A short exposure under current is sufficient and the evaluation can be documented permanently. The test medium is then immediately blown off and recycled, significantly reducing consumption.
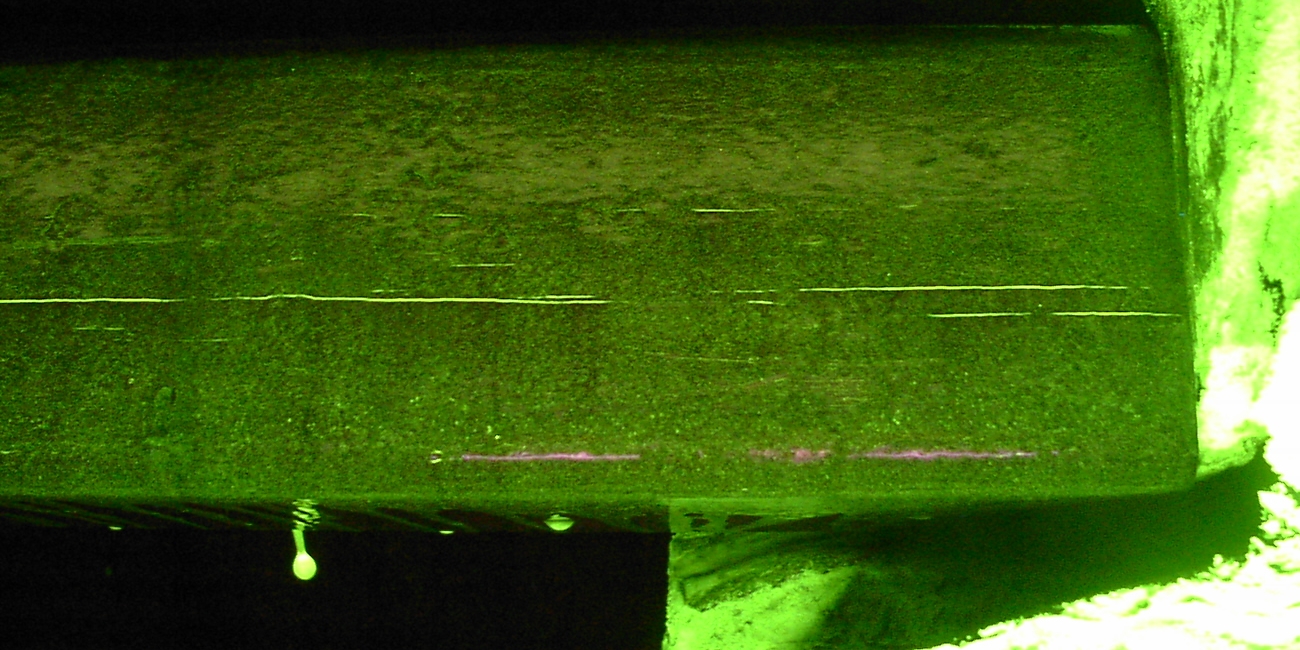
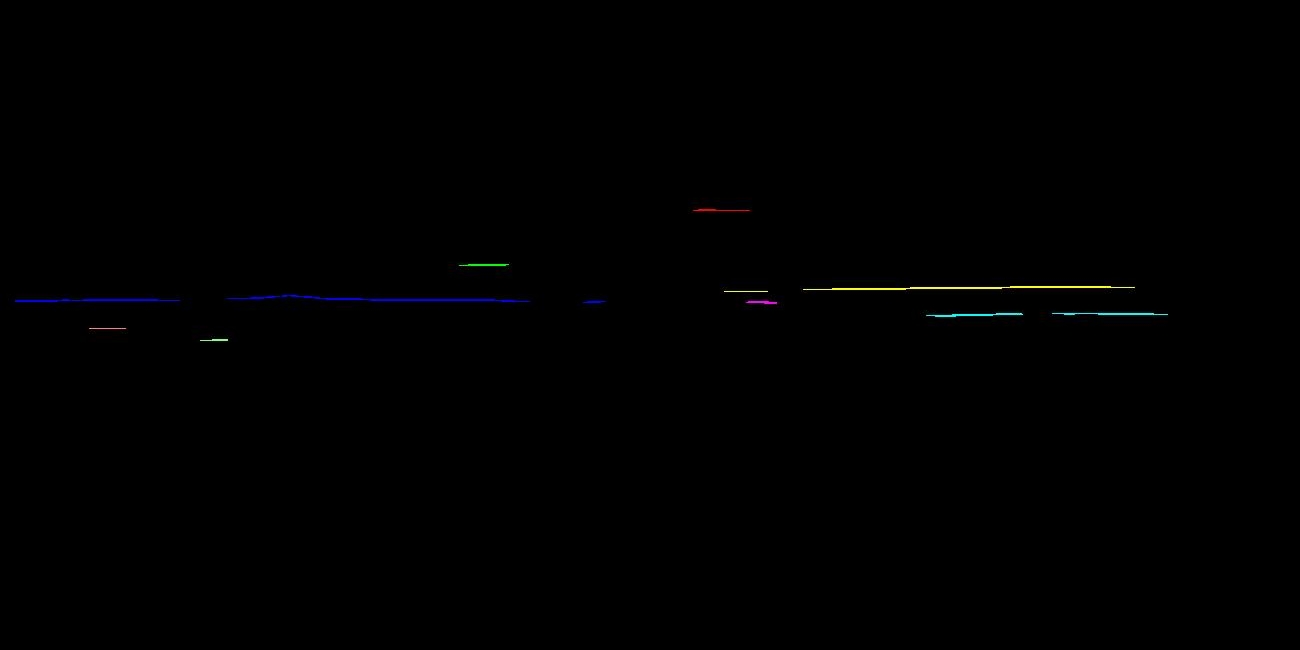
Billets with cracks (wet fluxes), shot with LED flash at 1.2 m/s.
Automatic inspection software

The software of the image processing system realized on a PC platform recognizes and measures a wide variety of linear displays that stand out from their surroundings due to their shape and intensity.

For this purpose, both the intensity and the geometric form of the displays are evaluated. The software detects cracks regardless of direction, curvature or branching and can distinguish them from objects of other shapes (artefacts) even at lower intensity. Even cracks with interrupted display are recognized as belonging together. Each display is classified and measured according to length, width, intensity, direction, location and contour.

Crack indications > 5mm are marked in colour, fault patterns, even if they are brighter, do not affect the result.

The software of the image processing system realized on a PC platform recognizes and measures a wide variety of linear displays that stand out from their surroundings due to their shape and intensity.

For this purpose, both the intensity and the geometric form of the displays are evaluated. The software detects cracks regardless of direction, curvature or branching and can distinguish them from objects of other shapes (artefacts) even at lower intensity. Even cracks with interrupted display are recognized as belonging together. Each display is classified and measured according to length, width, intensity, direction, location and contour.

Even on complicated surfaces, such as here on a crankshaft, cracks can be indicated and detected automatically.
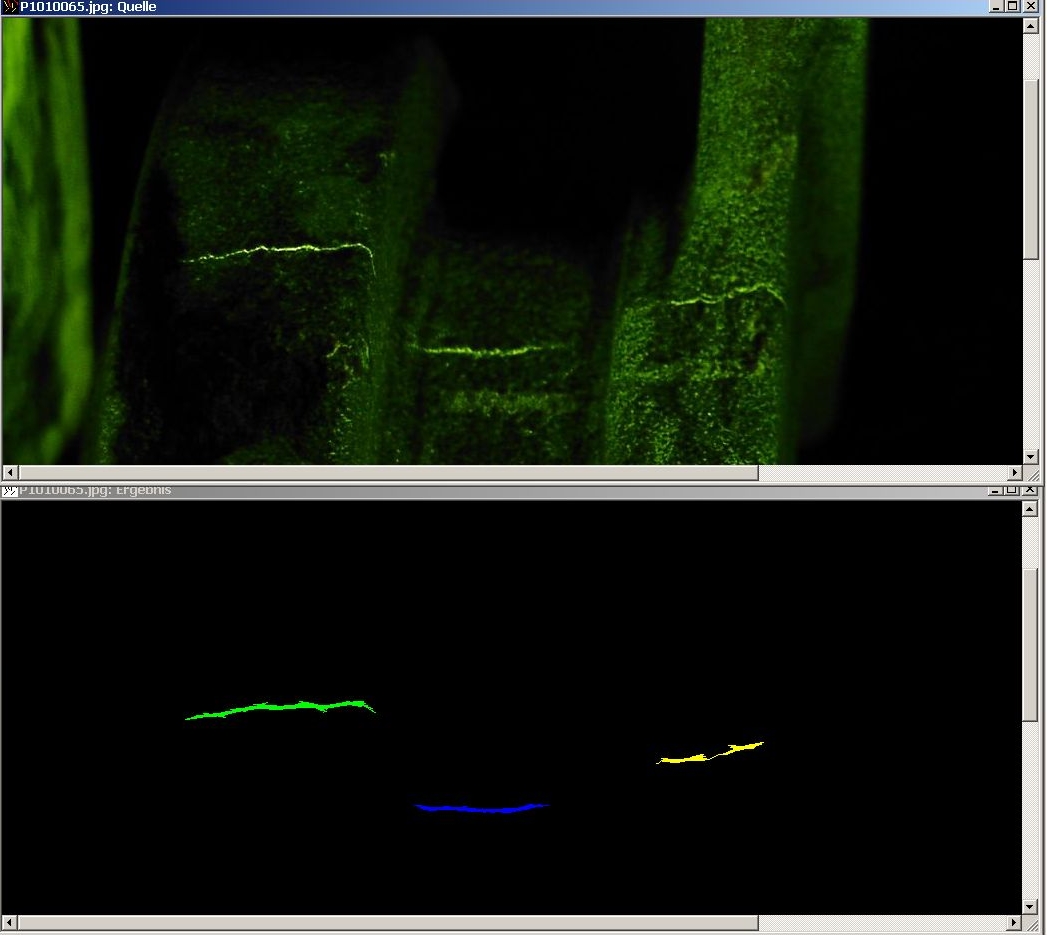
CVS magnetic particle inspection
PDF DOWNLOAD
CVS-with flux check
PDF DOWNLOAD
CVS-with billet flux check
PDF DOWNLOAD
This page as PDF
PDF DOWNLOAD